This one is taken directly from my Facebook status this morning.
You know sometimes it funny how you'll get exactly what you need.
I haven't posted a weight loss update for a few weeks now because I have plateaued and have been staying right between the same three pounds. I wasn't upset with myself. Im very proud of my progress and work. Im 90% to my goal weight. I have roughly 20 pounds more that I would like to loose. I remember being told that the final pounds would be the hardest to loose. I wasn't feeling depressed over it. It was more just like a "UGH REALLY?!?!?!?" feeling.
Then this morning while walking Sirius I ran into one of the other beagle parents in the neighborhood. We hadn't spoke directly in a while and this morning she said "Oh my god you've changed I didn't even recognize you till I saw Sirius. You look amazing"! I explained I had bariatric surgery in December (A fact about myself that I hide from no-one) and she congratulated me and wished me continued success with my hard work.
I don't know why but that little conversation was exactly what I needed this morning!
Friday, November 6, 2015
Sunday, October 4, 2015
Bacon Cheeseburger Meatloaf Muffins
I haven't posted in a while so it was long overdue. At first I thought that I would do something in honor of Pumpkin Flavored Everything Season. But then I got an idea for dinner and the following recipe was created!


Bacon Cheeseburger Meatloaf Muffins
Servings: 12 Texas size muffins
Total cooking time: Aprox. 30 minutes
Ingredients:
- 2 lbs Extra Lean Ground Beef
- 15 Slices Pre-Cooked Bacon Chopped
- 3 Tablespoons Egg Substitute
- 1/2 Cup Panko Style Breadcrumbs
- 1 Medium Yellow Onion, Finely Chopped
- ¾ Teaspoon Salt
- 1/2 Teaspoon Black Pepper
- 1 Cup Catchup
- 1/2 Cup Mustard
- 1 1/2 Cup (12 Oz.) Colby-Jack Cheese Shredded
Special Ingredient Note:
When it comes to shredded cheeses I prefer to buy a block of cheese and grate/shred it myself. Yes those pre-cut bags may be time savers but they also come with extra preservatives to make them last longer and part of this new life for me is about putting better things in my body. Also if you compare the price per volume you'll be pleasantly surprised to learn its actually cheaper to buy the cheese as a block.
Directions:
- Pre-heat the oven to 425°.
- Lightly mist a muffin try with cooking spray and set aside (I used 2 texas muffin pans).
- In a large bowl, combine the ground beef, bacon, egg substitute, breadcrumbs, onion, salt, & pepper and lightly mix together.

- Divide the meat mixture evenly into your prepared muffin tin. I used a cookie/ice cream scoop to evenly dispense the meat mixture.

- In a separate bowl, mix together the catchup and mustard to make a "sauce". Its not in the ingredient list but I added some hamburger seasoning.

- Spread 1 tablespoon of the "sauce" evenly over the tops of each muffin.

- Bake for 30 minutes and remove from the oven. Check for doneness as cooking times can vary based on muffin size and oven type.
- Top each muffin with about two tablespoon (1 oz.) of shredded cheese and then return to the oven for 2-3 minutes until the cheese is melted.


Nutritional Information:
Calories: 283
Fat: 14 grams
Carbs: 12 grams
Protein: 25
 |
| Created Using MyFitnessPal |
Monday, August 31, 2015
Its not a fix, its a tool. You still have to work at it!
So the other day I was talking to someone about how much weight I had lost and I was asked "Did you do it through your own work or did you have surgery?". I took a few moments to discuss my background, decision, and work towards my progress and used that time to politely correct his thoughts regarding the weight loss surgery process and those that choose to go through it. It inspired me to write a serious post.
Regardless of if you are considering weight loss surgery as an option for you or not here are a few things for you to consider and/or understand.
WLS is not a fix, its a tool. I still have to work at it to maintaining my progress:
There are many things I have to maintain since I have had weight loss surgery (WLS) and I will admit some times they are a challenge for me. After reading the following I hope you understand that this truly is not a fix for fighting obesity but a tool. If I don't stay onto of the following I can damage and reverse my progress.
- Protein - I need to make sure I eat between 80-120 grams of protein a day to maintain my body's needs. My body needs a higher protein level to burn fat and maintain my body. Its crucial for the maintenance in hair and nail growth as well.
- Hydration - We've all heard that it is a good idea to drink eight to ten glasses of water a day. Its a little more important as a bariatric patient to follow this rule of thumb. Proper hydration helps with maintaining your metabolism rate. Dehydration can learn to serious health problems as well as needing to be admitted to the hospital for medical attention.
- Vitamins - Since my body absorbs things differently now there are special multivitamins for bariatric patients that I need to take daily to ensure I get the nutrients I need.
- Fat/Carbs/Sugar - Its important to watch my intake of fat, carbs, and sugar. If at any point I have too much of these it can lead to me having a very uncomfortable bathroom experience. It can also lead to what is sometimes referred to as dumping syndrome. For some it is exactly as it sounds. For me its more like my body instantly goes through a flush of all energy and I feel ill for up to a half hour. Ill actually get to the point where I need to go lay down.
- Exercise - I have got to work hard at being more active now so that I can maintain the weight loss as well as help create the new more fit me.
Sunday, August 16, 2015
Bariatric Friendly Pumpkin Yogurt Cake
I am so ready for "Pumpkin Flavored Everything" Season! Having a family gathering today and I was asked to make a desert. I thought of making my Apple Almond Yogurt Cake but really wanted to incorporate pumpkin into it. I removed the applesauce from the recipe, added the pumpkin, and increased the almond flour since the wet ingredients were now a little more than the previous recipe. In the end I decided to put the batter in a 9" x 11" baker instead of a loaf pan. Hope you enjoy!


Bariatric Friendly Pumpkin Yogurt Cake
Servings: 12
Total Cooking/Baking Time: 45 Minutes
Ingredients:
- 2 Cups Almond Meal
- 2 Teaspoons Baking Powder
- 1/2 Teaspoon Salt
- 1 Serving Protein Powder
- 3/4 Cup Sugar Substitute (I Used A Stevia baking blend)
- 1 6oz Container Plain Greek Yogurt (I used Chobani Plain)
- 1 15oz Can Of Pumpkin Puree
- 1/4 Cup Egg Substitute (Equivalent Of 1 Egg)
- 1 Teaspoon Pure Vanilla Extract
Directions:
- Preheat oven to 350°.
- In a small bowl whisk together the Almond Meal, Baking Powder, Salt, and Protein Powder and set aside.

- In a separate bowl combine Sugar Substitute, Greek Yogurt, Pumpkin Puree, Egg Substitute, and Vanilla.

- Blend the dry ingredients into the wet ingredients.

- Pour into a greased baking dish.

- Place in oven and bake for 40 - 45 minutes.
- Test cake with skewer or cake tester to verify doneness and cool on a wire rack for fifteen minutes.
- Divide evenly into servings and enjoy.


Nutritional Information Per Serving (1/12th of cake):
Calories: 175
Fat: 9.7 Grams
Carbs: 20.5 Grams
Protein: 8.2 Grams
 |
| Calculated using MyFitnessPal |
Wednesday, August 12, 2015
Reduced Sugar Reduced Carb Banana Bread
I felt like playing in the kitchen today and had a craving for banana bread. I looked at different recipes for banana bread and started thinking how I could make one that is bariatric friendly and came up with the following recipe. Im excited for this one as it is an original.


Reduced Sugar Reduced Carb Banana Bread
Servings: 12
Total Cooking/Baking Time: 60 Minutes
Ingredients:
- 1 Cup Almond Meal/Flour
- 1 Cup Coconut Flour
- 1 Teaspoon Baking Soda
- 1/4 Teaspoon Salt
- 1/2 Cup Unsweetened Applesauce
- 3/4 Cup Sugar Substitute (I used Trivia Baking Blend)
- 1/2 Cup Egg Substitute (Equivalent of 2 eggs)
- 4 Medium Bananas Mashed
Directions:
- Preheat oven to 350°.
- In a large bowl mash the bananas.

- Add the egg substitute, applesauce, & sugar substitute to the banana and blend together.

- In a separate bowl combine the flours, baking soda, and salt.
- Blend the dry ingredients into the wet ingredients until a soft wet dough forms.

- Place dough in a loaf pan spread with cooking spray and shape to evenly fit and fill pan.

- Bake in preheated oven for 60 minutes or until cake tester or knife comes out dry.


Nutritional Information Per Serving (1/12th of loaf):
Calories: 170
Fat: 6 Grams
Carbs: 25 Grams
Protein: 6 Grams
 |
| Created Using MyFitnessPal |
Monday, August 10, 2015
Low Carb Pumpkin Protein Muffins
Im on vacation visiting family this week in MD. I had a chance to play in the kitchen. Mom had some pumpkin so I immediately took to Pinterest looking for a recipe I could modify. I came across this recipe and made a few changes.


Low Carb Pumpkin Protein Muffins
Servings: 12
Total Cooking/Baking Time: 35 Minutes
This recipe is modified from the original found here.

This recipe is modified from the original found here.
Ingredients:
- 1 15oz Can Pumpkin Puree
- 1 Cup Almond Meal/Flour
- 2/3 Cup Coconut Flour
- 1 Serving Protein Poweder
- 1 Cup Sweetener (I used Trivia Baking Blend)
- 1 Tablespoon Pumpkin Pie Spice
- 1 1/2 Teaspoons Cinnamon
- 2 Teaspoons Pure Vanilla Extract
- 1/2 Teaspoon Salt
- 1/2 Teaspoon Baking Soda
- 1/2 Cup Egg Substitute (Equivalent of 2 eggs)
Directions:
- Preheat oven to 350°.
- In a large bowl combine the Pumpkin, Sweetener, & Egg Substitute.
- Blend together with an electric mixer till well blended.
- Add remaining ingredients and blend with mixer until well incorporated.

- Divide evenly amongst 12 prepared muffin cups.

- Bake for approximately 35 minutes until edges are golden and a cake tester or knife comes out clean.

- Allow to cool in muffin pans for a few minute.
- Remove from pan and allow to continue to cool.


Nutritional Information Per Serving (1 Muffin):
Calories: 165
Fat: 6 Grams
Carbs: 25 Grams
Protein: 6 Grams

Sunday, August 9, 2015
Products I Like: Power Crunch protein energy bars
 Im always keeping my eyes open for new products that can help me, as well as other bariatric patients and dieters, with my protein rich dietary needs. Yesterday I found myself visiting the pharmacy section at my local store to find some protein goodies I could take on my trip home to visit family and stumbled upon a line called Power Crunch.
  |
| french vanilla créme Nutrition Facts |
Friday, August 7, 2015
Weigh In Day - Stick With One!
So today was weigh in day. Since surgery I picked Friday to be the day that I step on the scale to see what my progress was regarding my weight-loss. This past week things got a little mixed up and it reminded me of a very important lesson.
Last week I stepped on the scale on Wednesday instead of Friday and used that number as my update. A few days later I decided after going for a 16 mile bike ride to step on the scale and was immediately surprised to learn that I had lost four more pounds since stepping on the scale on Wednesday. Then this morning I stepped on the scale and learned that I had actually gained 2 pounds back. At first this kind of depressed me because this is the first time I had gained weight back since my surgery. It wasn't until I looked at the recorded dates and amounts of my weight loss that are realize that I actually lost 2 pounds since last week regardless of the fact that my we had gone down and back up.
This reminded me of how important it is to pick one date as your weigh in day and stick with that day because your weight can constantly fluctuate due to all kinds of things. It is also important to pick a common time and stick with it. So for example I have decided that Friday mornings before I get dressed for work is the perfect time for me to step on the scale and get an update on my weight-loss progress. This way I am able to use a common point to monitor my progress.
Friday, July 3, 2015
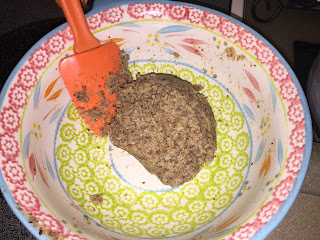
White Chocolate Peanut Butter American Flag Tart
Happy Independence Day Everyone!
The other day Paul and I decided to invite a few friends over after work on the 4th of July for some cookout fun. I get quite excited at the idea of gatherings and found myself running to the grocery store to get plenty of goodies. Before heading out I came across this recipe and knew I wanted to make it because 1) it had a patriotic theme and 2) it was bariatric friendly. I tried to think of a few things I could do to modify the desert and came up with this.

The other day Paul and I decided to invite a few friends over after work on the 4th of July for some cookout fun. I get quite excited at the idea of gatherings and found myself running to the grocery store to get plenty of goodies. Before heading out I came across this recipe and knew I wanted to make it because 1) it had a patriotic theme and 2) it was bariatric friendly. I tried to think of a few things I could do to modify the desert and came up with this.

White Chocolate Peanut Butter American Flag Tart
Servings: 8
Total Cooking/Baking Time: 20 Minutes
This recipe is modified from the original recipe "Bye Bye Miss American Pie" found here.
Nutritional Information Per Serving (1/8th of tart):
This recipe is modified from the original recipe "Bye Bye Miss American Pie" found here.
Ingredients:
- 3 Tablespoons Liquid Egg Whites (Equivalent of one large egg.)
- 1 1/4 Cups Almond Meal
- 1/4 Cup Truvia Baking Blend
- 1/2 Teaspoon Pure Vanilla Extract
- 1/4 Teaspoon Salt
- 1 8 Ounce Block Fat Free Cream Cheese
- 1/2 Cup P28 White Chocolate Spread (found here as well as some grocery stores)
- 1 Cup Sugar Free Cool Whip
- Roughly 1 Cup Strawberry Halves
- Roughly 1 Cup Whole Blueberries
- 1/2 Medium Banana Sliced
- Roughly 4 Tablespoons Palmer Sugar Free Seedless Raspberry Preserves
Directions:
- Beat egg white, Truvia, vanilla extract and salt in a small bowl with hand whisk till fully mixed.

- Blend in the almond meal till dough forms.
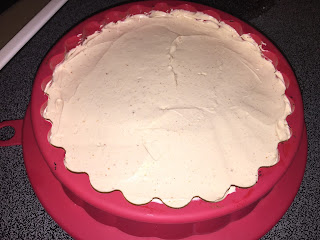
- Spread dough into a round tart pan.

- Bake at 400° for 20 minutes or until golden and firm to the touch.

- Remove from oven and cool completely.
- Blend cream cheese with white chocolate spread until smooth using a hand mixer.
- Blend in the Cool Whip.

- Cover & chill.
- Spread the cooled cream cheese/white chocolate mixture evenly on crust.
- Start with blueberries and make a outline on the tart and the upper left corner.
- Use the strawberry halves and banana slices to make the red and white stripes on the flag.
- Warm the preserves over medium heat stirring till runny like a syrup.
- Using a pastry brush, brush the fruit with the preserves.
- Cover and chill at least 1 hour or till ready to serve.


Nutritional Information Per Serving (1/8th of tart):
Calories: 299
Fat: 16 Grams
Carbs: 27 Grams
Protein: 15 Grams


Sunday, June 28, 2015
Thoughts on progress. Entry No. 1
This may become a ongoing part of my blog but I decided to take a moment and talk about my thoughts regarding my progress as well as concerns I am facing that I think is important for anyone on a weight loss journey. Yeah I wanted my blog to be nothing but fun and excitement but I thin some serious moments are needed as well.
My mind has really been focusing on the fact that I am in the 230s. Like I said the last time I was in the 230s was around 2009/2010. As my weight has always been a struggle for me from my teens till today the last time I can remember being in the 230s or lighter was 1999/2000 when I was 20/21. Since I've never seemed to be able to maintain that weight or surpass it I have a nagging fear in the back of my head that I could easily hit relapse again and balloon back to a heavier weight as I have numerous times before. I have also been observant of the fact that I know quite a few people that have had weight loss surgery at different stages of their life and have since gained some of that weight back. I also know of a few people that had weight loss surgery around the same time I did and have lost a fraction of the weight that I have. I consider myself very fortunate and in retrospect have had a re-understanding of the following and would like to share it.
1) I, as well as anyone else on a weigh loss journey, must continue to work hard on this if I want to maintain my progress and success!
2) Weight loss surgery is not a quick fix!
1) I, as well as anyone else on a weigh loss journey, must continue to work hard on this if I want to maintain my progress and success!
- If I wish to continue with my progress and success I must continue to put the work and effort into it. That means watching what I eat, recording it in a diary, and must put in the time to be physically active. Im glad Ive learned to enjoy riding a bike down the trail located near me but I also need to start making sure I find other things like going to the gym. This is especially important since there have been rainy days lately, and the bike I was using is currently being repaired. That has easily become my excuse for not getting my physical activity in.
2) Weight loss surgery is not a quick fix!
- I never thought this to begin with. However I feel its important to remember this, as well as point it out for anybody contemplating having weight loss surgery! Weight loss surgery is a tool, short and simple. This tool helped me get where I am today and I need to remember, as I push towards my goal, that this is a one time only tool. If I mess up and return to my care free sedentary lifestyle all my progress could be for nothing and there is no second surgery they can go in to do this all again!
Bacon Cheeseburger Pie
I have not made many blog post this month at all and Im sorry for that! That being said I decided to modify another recipe I came across to come up with a delicious dinner that can easily translate into lunches for later in the week. Hope you enjoy!


Bacon Cheeseburger Pie
Servings: 8
Total Cooking/Baking Time: 30 Minutes
This recipe is modified from the original recipe "Cheeseburger Pie" found here.
This recipe is modified from the original recipe "Cheeseburger Pie" found here.
Ingredients:
- 1 Pound Extra Lean Ground Beef
- 1 Medium Sweet Onion, Diced
- 5 Slices Pre-cooked Bacon
- 1/4 Cup Ketchup
- 2 Tablespoons Yellow Mustard
- 1/3 Cup Baking Mix
- 1 Cup Milk (I used 2%)
- 1/2 Cup Egg Substitute (or 2 large eggs)
- 8 Ounces Cheddar Jack Cheese, Shredded
Special Ingredient Notes:
- As I always say with cheese, it is cheaper and healthier to buy the cheese as a block and shred or cut it yourself. Pre-shredded cheese may be a time saver but it has extra preservatives.
Directions:
- Preheat oven to 400°.
- Spray 9 inch pie plate with cooking spray.
- Cook the ground beef over medium high heat for 5 to 7 minutes until brown throughout.

- Add the onions and bacon and cook an additional 2 to 3 minutes, until tender.

- Drain off as much of the fat as possible.
- Add ketchup and mustard to meat and mix thoroughly.

- Spoon meat mixture into the prepared pie plate and spread out as evenly as possible.

- Add baking mix, milk, and egg substitute in a small bowl and whisk until blended.

- Stir in the cheese.

- Pour over the meat mixture in pie plate.

- Bake for 25 to 30 minutes, until knife inserted in center comes out clean and top has browned.

- Cut into wedges and enjoy.


Nutritional Information Per Serving (1/8th of pie):
Calories: 260
Fat: 14 Grams
Carbs: 10 Grams

Monday, June 8, 2015
Personal Wonton Taco Cups
I loved how the lasagna cups turned out and have been thinking of new ways I could modify the recipe. I decided it was time for a Taco themed dinner and came up with this recipe. One of the things I love best about this recipe is that it easily packs up for future meals away from home like work!


Personal Wonton Taco Cups
Servings: 12
Total Cooking/Baking Time: 20 Minutes
Ingredients:
- 15 Ounces Whole Milk Ricotta Cheese
- 4 Ounces 1/3 Less Fat Cream Cheese
- 1 Tablespoon + 3 Tablespoons Taco Seasoning
- 1 Tablespoon + 12 Tablespoons Taco Sauce
- 1/4 Cup Egg Substitute (Equivalent Of 1 Large Egg)
- 1 Pound 96% Lean Ground Beef
- 8 Ounces Colby Jack Cheese Shredded
Special Ingredient Notes:
- As I always say with cheese, it is cheaper and healthier to buy the cheese as a block and shred or cut it yourself. Pre-shredded cheese may be a time saver but it has extra preservatives.
- My initial instinct with the Ricotta was to reach for part-skim. After looking at the nutritional labels I was surprised to learn that where as part skim may have a slightly lower fat content the whole milk variety has a lower sugar and carb count.
Directions:
- Preheat oven to 375ºF
- Combine the Ricotta, Cream Cheese, Egg Substitute, 1 Tablespoon Taco Seasoning, & 1 Tablespoon Taco Sauce in a bowl and set aside.

- Brown the ground beef, drain, and set aside.
- Stir in the remaining Taco Seasoning with the Ground Beef until thoroughly mixed.

- Spray 12 texas muffin style muffin cups with cooking spray.
- In each cup place two wonton wrappers and press firmly onto bottom and against sides of each cup.

- Divide the ground beef evenly amongst the 12 muffin cups (Roughly 1 1/2 Tablespoons per cup).

- Place 1 Tablespoon of Taco Sauce on top of the ground beef.

- Top each cup with another wonton wrapper and press down. (I found that a measuring cup worked great for this).

- Divide the cheese mixture evenly amongst the 12 muffin cups (Roughly 2 Tablespoons per cup).

- Divide the colby jack evenly amongst the 12 muffin cups (Roughly 1 1/2 Tablespoons per cup).

- Bake for 20 minutes.
- Remove from oven and allow to cool slightly before serving. (I found that allowing them to cool for a bit made it easier to remove from the pans)
 Nutritional Information Per Serving:Calories: 278Fat: 14.8 GramsCarbs: 15.4 GramsProtein: 18.1 Grams

Created using the MyFitnessPal App


Subscribe to:
Comments (Atom)